Feeds:
Posts
Comments

In my life, there are some simple facts.

Coffee is necessary in the morning.

The color purple makes anything better.

Dogs are way more fun than cats.

I always prefer a cupcake to a muffin.

However, sometimes there are little exceptions. Like when you find a borderline-on-cupcake muffin recipe. You know, the cupcake that is masquerading as a muffin. It’s the kind of thing that you can justify eating first thing in the morning, but deep inside you know you are pretty much eating dessert.

I originally found the recipe for these muffins at www.mybakingaddiction.com . However, when I started making them at home, I realized I was missing some ingrediants and had other things to add. This led me to make Cinammon Apple Glazed Muffins.

Batter
1/4 cup butter
1/4 cup canola oil
1/2 cup white sugar
1/3 cup lightly packed brown sugar
2 eggs
1  1/2 tsp baking powder
1/4 tsp baking soda
1 tsp cinnamon
3/4 tsp salt
1 tsp vanilla extract
2  2/3 cup flour
1 cup milk
1 apple, diced

Cream butter, oil, and sugars together until smooth. Add in the eggs, beat well to combine. Stir in the baking powder, baking soda, cinnamon, salt, and vanilla.

Stir the flour into the butter mixture alternatively with the milk, beginning and ending with the flour. Thoroughly combine.

Spray a muffin tin with nonstock spray and spoon the batter into the pan (I got 20 cups full).

I wanted to try some of these muffins without apple and some with. So for the other pan, I pressed the apple pieces into the batter.

I ended up liking the muffins with the apple in them much better so next time, I would mix the apple right in with the batter.

Cook for 13-15 minutes at 425F. Cool slightly.

Glaze
3 tbsp butter, melted
1 cup icing sugar
3/4 tsp vanilla
2 tbsp hot water

Whisk together butter, icing sugar, vanilla, and water until smooth.

After the muffins are slightly cooled, dip the top of each muffin into the glaze, then allow the glaze to harden. I dipped each muffin twice.

The muffins were just the right amount of sweet and would be perfect for a brunch.

Nobody needs to know these are pretty much a cupcake. It can be our little secret.

Today’s Sweetness: Hubby came home from out of town a day early!

Parmesan Knots

I have a great love of two types of food-candy and bread. I could eat either of those all day, every day (well, until my teeth fell out, that is). This love has lead me to search out recipes for the two foods. It’s pretty hard to find a good candy recipe (and much easier to go to 7-11 and buy it) but there are thousands of great bread recipes out there.

I offered to bring some type of buns to a family dinner on Sunday. Once I had decided to bring this, I went through my recipes, trying to find the perfect recipe to try out. The most interesting recipes I had were using frozen rolls as the dough and that seemed way too easy to me so I decided to improvise and came up with a delicious recipe.

Parmesan Knots
2 1/2 tsp yeast
1 cup warm water
2 cups flour
2 tbsp olive oil
1 tsp salt
2 tsp white sugar
melted butter
parmesan cheese

In a small bowl, dissolve yeast in warm water. Let stand until creamy (about ten minutes).

In a large bowl, combine flour, oil, salt, and sugar with the yeast mixture. Mix until a stiff dough has formed. Knead on a floured surface until the dough is smooth and elastic (about a minute).

Cover and let rise for about 30 minutes.

Once the dough has risen, place on a floured surface.

Cut the dough into small chunks (I got 8 chunks out of the dough). Roll our each chunk until about 7-8 inches in length and then tie into a knot.

Brush the tops of each bun with melted butter and bake at 350F for about 15 minutes or until the tops are golden brown.

Let the buns cool for about 5 minutes. Brush completely with melted butter and then roll in parmesan cheese until covered.

These tasted a lot like Little Ceasar’s Crazy Bread but homemade so 100% better! They were extremely easy to make and quick to make. I only wish they had made more!

Today’s Sweetness: A good night’s sleep to get me through the day.

Peanut Butter Cupcakes

A few weeks ago, I made the best cupcakes in the world. I found the recipe at www.somethingshinyblog.com and knew immediately I had to make these. It was a cupcake on steroids. There was goodness on top of goodness and it will be a challenge to ever beat this recipe.

Cupcakes
1/2 cup butter
2 oz bittersweet chocolate
1/2 cup cocoa powder
3/4 cup flour
1/2 tsp baking soda
1/2 tsp baking powder
2 eggs
3/4 white sugar
1 tsp salt
1/2 cup sour cream
1 bag mini Reese’s Peanut Butter Cups

Combine butter, chopped chocolate, and cocoa in a bowl. Microwave for 30 seconds and then stir. Continue microwaving until smooth. Cool until barely warm.

In a separate bowl, combine flour, baking soda, and baking powder.

In another bowl, beat the eggs, then whisk in the sugar and salt. Add the cooled chocolate mixture, beating until smooth. Sift 1/3 of the flour mixture into the chocolate mixture and whisk until fully combined. Add sour cream, mixing well. Whisk in remaining flour mixture until fully incorporated and batter thick.

Divide batter into cupcake tins. Press a mini Reese’s cup into the center of each cupcake until level with the top of the batter.

Bake at 350F for 15-20 minutes until a toothpick comes out clean.

Peanut Butter Frosting
1 cup creamy peanut butter
5 tbsp butter
2 cups icing sugar
1/2 – 2/3 whipping (heavy) cream

Beat peanut butter, butter, and icing sugar until thoroughly combined. Add cream and beat until light and fluffy.

Spread onto cooled cupcakes.

The original recipe had a homemade magic shell recipe to complete this cupcake. However, it seems that all the grocery stores near me do not carry coconut oil and after 30 minutes of driving around looking for it, I decided to just go with the store bought magic shell.

Before dipping, the icing on the cupcake must be cool so the chocolate will harden properly. I left the cupcakes in the fridge for about 30 minutes before dipping.

One simple dip, and the cupcake was complete.

These cupcakes should be kept cool until serving so the chocolate coating does not melt.

I thought these cupcakes might be too sweet but they were simply perfect. I originally made these cupcakes about a month ago and have been dreaming of them ever since… Definitely a recipe to hold onto!

Today’s Sweetness-Big Brother starts on TV tonight. Enough said.

Christmas in July

Christmas is my absolute favorite holiday. As soon as Thanksgiving is over, I count down the days until it’s appropriate to start putting up decorations and break out the Christmas music. I try and stretch out Christmas by at least a month.

Last night I hosted our D.A.T.E. night and I thought what could be better than Christmas in July? It’s just over the halfway mark to the holiday and it would be something totally unexpected.

I had to refrain myself from pulling all my decorations out this weekend while decorating. I tried to just do the basics but still have the house feel “Christmas-y”

One of my favorite parts of Christmas is stockings so I wanted to include that. I had no luck finding actual Christmas stockings so I stuck to Superstore socks.

There were a couple very happy guys who left not only with the contents of their stockings, but a pair of new socks as well!

I wanted to include a fun activity as well so I went with gingerbread house making. No luck finding any kits around (I was hoping for some really great deals on some expired kits) so we had to do it the old fashioned way.

I bought the candy on Saturday and it has been tempting me ever since. I was glad to finally put it to use.

The gingerbread house making was a success! Bonus points were given out for the most creative house and there were some pretty interesting creations!

Christmas in July was a bit strange because the temperature outside was around 25C and the temperature inside my oven of a house was even hotter. But all in all, it was a good night!

Now to take down all the decorations…

Today’s Sweetness: I’m wearing my favorite shirt today. And that always makes for a good day!

I am a huge fan of breakfast food. I could eat it all day, every day. Especially the breakfast food that could almost be considered a dessert. Cinnamon buns falls into this category

Hubby and I went to a friend’s cabin for the long weekend and I volunteered to bring breakfast for the group. What better way to spend your morning at the lake then with a cup of coffee and a cinnamon bun? They were absolutely perfect!

Normally I make these cinnamon buns in a 9 x 13 pan. This time I tried something a little different and made them in cupcake tins. They came out looking perfect but I think in the future I would stick to the 9 x 13 pan because they made a bit of a mess in the cupcake tins.

Cinnamon Buns
Dough:
1/4 cup white sugar
1/2 cup warm water
2 1/2 tsp dry yeast
1/2 cup milk
1/4 cup butter
1 tsp salt
2 eggs, beaten
4 cups (approximately) flour

Filling:
1 cup butter
1 1/2 cup brown sugar
1 tbsp cinnamon

Dissolve 1 tsp of the white sugar in warm water and sprinkle in yeast. Let stand for 10 minutes or until frothy. Meanwhile, in a small saucepan, heat milk, remaining sugar, butter, and salt until butter has melted. Let cool to lukewarm. In a large bowl, combine eggs, milk mixture, and yeast mixture.

Using an electric mixer, gradually beat in 2- 2.5 cups of the flour. Beat for 2 minutes or until smooth. With a spoon, gradually stir in enough of the remaining flour to make soft, slightly sticky dough that comes away from the side of the bowl.

On a lightly floured surface, knead the dough for 7-10 minutes or until smooth and elastic. Place in a large, greased bowl (I use cooking oil for grease), turning to grease all over. Cover with a towel and let rise in a warm place for 1 to 1.5 hours or until doubled in bulk.

Punch down dough.

In a sauce pan over medium heat, melt 3/4 cup of the butter with 3/4 cup of the sugar, whisking until smooth. Pour into a greased pan. Combine remaining sugar and cinnamon, set aside.

On a lightly floured surface, roll out dough into a rectangle. Spread remaining butter across the surface and sprinkle with the sugar mixture.

Tighly roll up, pinching seam to seal. Cut into 15 pieces and place in pan. Cover and let rise for 1 hour or until double in bulk.

Bake at 375F for 25-30 minutes or until the crust is golden and the tops sound hollow when tappen. Let stand in pan for 3 minutes and then invert onto serving platter.

Mmmm….makes me wish I had one right now!

Today’s Sweetness: The anticipation of a fun filled evening with D.A.T.E. night!

There are certain specifications my cookies generally need to meet. For the most part, I do not like hard cookies. I prefer them soft. For the most part I do not like flat cookies. I prefer them fluffy. And for the most part, I require that my cookies have a very sweet element to them, whether that be chocolate chips or icing or whatnot.

This last requirement has kept me away from peanut butter cookies in the past. I’m not completely opposed to them, but if I’m going to eat a cookie, it better have all my requirements.

Then I realized the obvious-chocolate chips could just be added into a peanut butter cookie recipe…

A little bit of chocolate and these cookies met all my requirements! Of course, now I don’t think I could ever go back to eat a simply peanut butter cookie…from now on, these cookies will have to have chocolate.

Chocolate Chip Peanut Butter Cookie
1/2 cup margarine
1/2 cup brown sugar
1/2 cup white sugar
1 egg
1 tsp vanilla
3/4 cup peanut butter
1 cup flour
1 tsp baking powder
pinch of salt
1 cup chocolate chips

Cream together margarine and sugars. Add the egg and vanilla and mix until combined. Add peanut butter and mix.

In a separate bowl, sift together flour, baking powder and salt. Mix into peanut butter mixture. Add chocolate chips.

Line baking sheets with parchment paper and spoon dough onto sheets.

Bake for ~12 minutes @ 375F

This recipe is very easy and the cookies quick to make. I definitely recommend it!

Today’s Sweetness: Hubby has been out of town since Monday and he comes home tonight!

My Weightloss Journey

Weight is something a lot of people struggle with, myself being one of them. This has been a lifelong struggle and a struggle that I am finding increasingly is important to share to give people encouragement and hope.

Growing up, I was a pretty normal sized child for the most part.

Of course, I was young but I can’t remember any issues with my weight before the age of 7 or 8. At that point in my life, my family moved from Winnipeg to Alberta and that is when my issues with weight began. Over the course of my elementary and jr. high years, I began to emotionally eat. I would eat when I was happy, I would eat when I was sad, I would eat when I was bored, and I would eat when I was stressed out. I’ve never been athletically gifted and I wasn’t interested in sports so there was a lack of exercise in my life. Couple that with overeating, and the weight starts piling on fast. By time I was graduating jr. high, I was one of the largest people in my class and had my fair share of fat comments directed at me.

High school made my eating habits much worse because suddenly I was in a school with a cafeteria full of junk food and vending machines down almost every hallway. At the same time, I was becoming more and more self conscious of my weight and desperately wanting to change it. I tried many different diets but each time I would last a few days and then when I saw no change happening, I would fall back into my old eating habits.

This pattern continued into college and by time I was 21, I was over 200lbs.

At that point, something clicked in my head and I knew I had to change the path I was headed down. It was the day after my 21st birthday when I decided to change my life.

I became obsessed with learning about healthy eating and exercise. I read as much as I could online and saw that normal people could lose weight the “old fashioned way”-by healthy eating and exercise. I ditched any ideas about any trendy diets that were out there and stuck to counting my calories in and counting my calories out.

I remember buying a scale a couple days into this lifestyle change and looking at the number, not knowing how I had let myself get to that point. However, in the back of my mind, a voice said to me “This is the biggest number you will ever see on this scale so don’t worry.”

I became pretty strict with my workout routine. I would work out on the treadmill  for almost an hour every day, never missing a day. I also religiously counted any calories I ate, determined to stay below a certain number. And it worked. I was losing on average 2 lbs a week and four months after I started, I was down 30 lbs.

At this point, I slowed down a little. I let myself have days off from working out and didn’t count calories so strictly. I went a few months where I would work out a few days a week, try and eat right, but not make too much of an effort. I was now at a weight that felt good to me and not losing any weight for the time being didn’t bother me too much.

It was about a year later when I decided I wanted to lose more weight. I once again began watching what I ate and exercising regularly. The weight dropped off again, and I arrived at a weight that was very close to ideal for my age and height. I have fluctuated around that weight each year since then, but I am now at a place where I am at peace with my weight.

One issue I have had is keeping diligent with this. Once you are at a weight you like, it’s easy to slip back into old eating patterns and skip workouts here and there. However, I know that weight is something I will struggle with for my whole life. It is not something that will one day go away. Accepting that has helped me not look at exercise and healthy eating as something that I have to do. Instead, it’s part of my everyday life.

Losing weight was the biggest challenge I ever took on and it has been one of the most satisfying goals to reach. I don’t believe this journey will ever be truly over, but I am happy with the path I am on now.


Today’s Sweetness: A vanilla latte first thing in the morning

Lemon-Limoncello Cupcakes

Last week, a lemon meringue pie was brought into my work. Lemon meringue pie is one of my favorite types of pie and it inspired me to make a lemon creation of my own. I stumbled upon lemon-limoncello cupcakes at www.browneyedbaker.com and couldn’t wait to try them!

These cupcakes are the perfect dessert for a summer evening and will satisfy any lemon lover out there. I brought them to a family dinner and they were the perfect end to the meal!

Cupcakes
1½ cups all-purpose flour
1 teaspoon baking powder
½ teaspoon salt
1/4 cup unsalted butter, at room temperature
1/4 cup cream cheese, at room temperature
1 cup granulated sugar
3 large eggs
2 tablespoons limoncello
½ cup buttermilk
¼ cup lemon juice
Zest of one lemon

In an electric mixer, beat the butter, cream cheese, and sugar on medium speed until light and creamy. Add in the eggs, one at a time, beating well after each addition. Add the limoncello and beat for a minute.

Combine the flour, baking powder, and salt. Add the flour mixture and buttermilk alternatively, beginning and ending with the flour mixture. Add the lemon juice and the lemon zest and mix until just incorporated.

Divide the batter into cupcake tins (mine made 17 cupcakes). Bake for 18-20 minutes at 350F or until a toothpick comes out clean. Cool completely

Lemon Curd
Zest of 2 lemons
½ cup lemon juice
¼ cup granulated sugar
1 egg + 1 egg yolk

In a saucepan, combine the zest, lemon juice, and sugar and bring to a simmer over medium heat. In a bowl, whisk together the egg and egg yolk. Whisk the lemon mixture into the eggs to temper them and then pour back into the saucepan. Over medium heat, whisk the mixture constantly until it thickens (should only take a few minutes). Remove from the heat and place in the fridge to cool completely.

I misread the instructions to this and put the juice of two lemons instead of the zest. That first batch was TART! Luckily I had just enough lemon juice to make a second, correct batch!

Icing
1/4 cup unsalted butter, at room temperature
1/2 cup cream cheese, at room temperature
1 tablespoon limoncello
2 cups powdered sugar, sifted

Beat together the butter and cream cheese on medium speed until light and creamy. Add in the limoncello and beat for an additional minute. Gradually add the icing sugar and beat until fully incorporated and smooth.

Now it’s time to assemble these cupcakes!

Scoop out the middle of each cupcake. I didn’t have a good spoon to do this so I just used a knife to cut a circle in the middle of the cupcake and then popped out the center. Spoon the lemon curd into the center of each cupcake.

Put the icing into a pastry bag and top each cupcake. Garnish with fruit.

The cupcakes turned out great and very delicious. A little messy to eat, but that’s what napkins are for!

When I first read the recipe it sounded like a lot of lemon so I made a raspberry curd to go in the middle of some of the cupcakes. The curd didn’t thicken very well though so I ditched that idea and just went with straight lemon. The all lemon cupcakes weren’t overwhelming so that was good. I think a different fruit curd would taste delicious in these cupcakes though. I will have to bake this recipe again soon and try that.

Today’s Sweetness: A night to myself tonight to relax at home.

Suddenly, a Garage!

Hubby and I moved into our first house last April. It was a new house in a new area which meant that our house sat in a lot of dirt. Last summer our project was the front yard-we put in grass, a bush garden, and a tree. And the project this year-the backyard.

A backyard of dirt is not fun when it is raining and your dog needs to go outside to go to the bathroom.

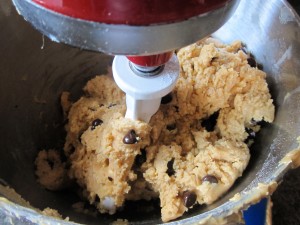
The deck was done a couple weeks ago and the next step-the garage. The building started last night. I wouldn’t exactly call myself a builder so I did my part: I baked them some of my special chocolate chip cookies

I would share the recipe…but it’s kind of a secret recipe so… ask me, and I’ll gladly bake you a batch!

The boys worked until it started raining last night, prepping for the big Saturday build. The weather was calling for rain, but luck was on our side and it held off all day.

This morning, building started at around 9am. I wanted to contribute to the whole experience, so I went shopping for a few hours.

I left to this view

And I came home to this!

The boys did a GREAT job getting it up! It makes the backyard look completely different and I couldn’t be happier to have a garage standing in my backyard. There’s still a lot of work to do on the garage but today’s progress was awesome.

Today’s Sweetness: Remember the robin I talked about a few days ago who has made its home in our neighborhood? Well, this little robin seems to have made its home right in our backyard! Under our deck are 4 nests, in various stages of being done

Tomorrow I am off to buy a bird feeder for this sweet birdy.